skinning.tools.initialize_weights package
Assign initial skin weights to a mesh using the provided joints.
Installation
- Extract the content of the .rar file anywhere on disk.
- Drag the skinning-tools.mel file in Maya to permanently install the script.
Note
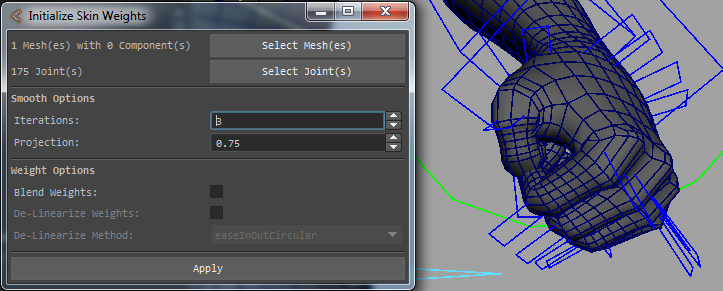
It can always be quite hard to find good bind settings to start of your skinning work. This tool will aid you to set the bind weights for you. There are a few options available to you to get the preferred result. It is possible to run this tool on specific components of a mesh. This will make it possible to use different settings on different parts of the mesh.
The mesh can be smooth in memory to get rid of areas that would be hard otherwise to find the best associated joint. If smoothing itself is not enough the point can be displaced along its normal based on a the shortest distance to the joint multiplied by the projection variable. This will ensure that the point gets moved closer to the best associated joint. At the same time this needs to be used carefully as it can cause unexpected result on areas like mouth cavities etc.
On top of this it is possible to already blend the skin weights between the line of the parent influence and its child. If the blend option is not used vertices will have a maximum influence of 1. If blending is used the max influences per vertex increases to 2. The way this number is calculated is to get the parameter of the closest point on the line from the specified vertex. By default the blending is linear, but tweening methods can be used to create a nice fall-off on the weighting.